The first time that you use Beacon you need to register. For subsequent logins you just need your email address and the password you used when registering
Registering to use Beacon for the first time.
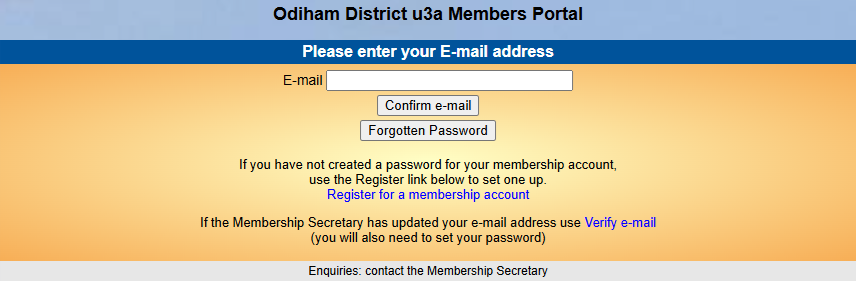
Enter the Beacon membership portal.
Click on "Register for membership account" (see screenshot below).
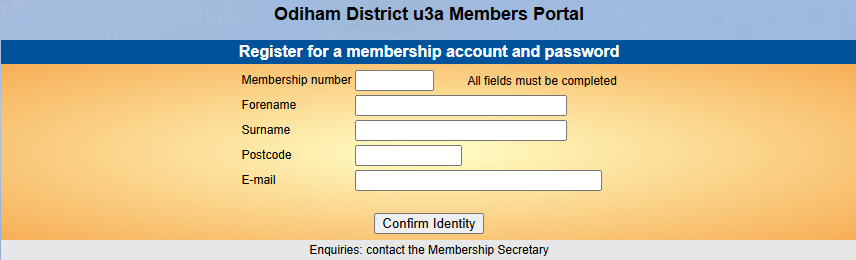
Enter the following and press "Confirm Identity"...
- Your Membership number. This can be found on your new membership card. If you have lost your card and don't know your number, please mail our membership secretary.
- Your Forename and Surname. These must be exactly the same as printed on your new membership card. They are case sensitive; so don't forget to capitalise the first letters.
- Your Postcode. This must have a space in the appropriate place.
- Your e-mail address. Ths must match the email address you supplied when joining the Odiham and District u3a.
If, after hitting "Confirm Identity", Beacon just clears all the fields so it looks like nothing happened, it is because the information you have entered does not exactly match what it has in its datebase for you. This can be frustrating; but unfortunatley, it's beyond our control. Try again, but if you simply can't get Beacon to recognise you, then mail our membership secretary. who will be able to re-supply the details Beacon has for you.
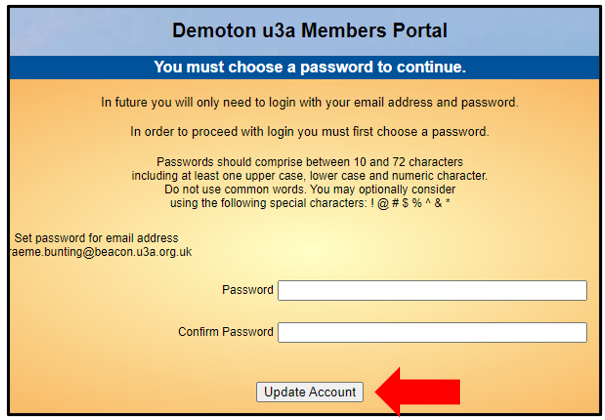
Enter a password which will enable you to login in the future. Don't forget to record the email and password somewhere safe, because you will need them on an annual basis when your renew your Odiham and District u3a membership.
Further help
The u3a Beacon team have created a more detailed guide on this registration process. Scroll down to the "Registering to use the Portal" section.
If you would like to know everything that a u3a member can know about Beacon, then the full Beacon user guide can be found here.
Should nothing work as detailed above, it may be because your browser to does not have something called "JavaScript" enabled. This is enabled in browsers by default, and it's rare that it is not enabled these days, but here is a guide to enabling it.